
This was our tree last year.
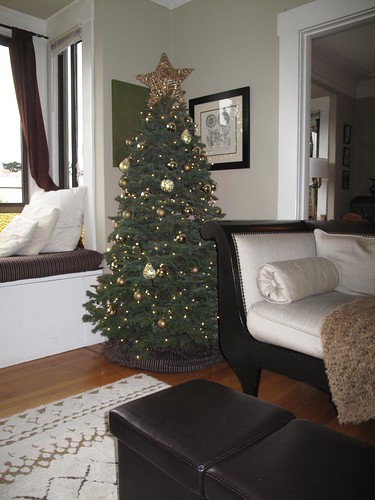
T was JUST about to start crawling, so the tree was safe.
My fantastically vintage gold glass ornaments could be at all levels.
Plus, our more classic house called for a classic tree. All neutrals = gold and glass.
But...
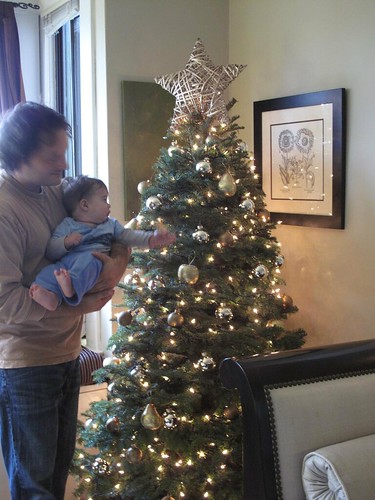
This boy

Turned into THIS boy
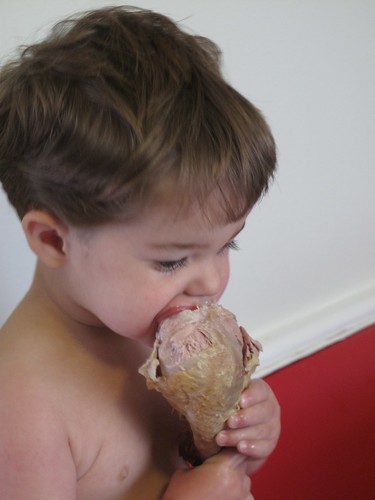
(aren't leftovers great?)
There was no way I was going to chance 30+ glass balls (his favorite toy) with this monster around.
side note: every year bubbs and I argue over if the word is "bulbs" or "balls".
At my sister's party last week, I wanted to try this pinterest find:
T was JUST about to start crawling, so the tree was safe.
My fantastically vintage gold glass ornaments could be at all levels.
Plus, our more classic house called for a classic tree. All neutrals = gold and glass.
But...
This boy
Turned into THIS boy
(aren't leftovers great?)
There was no way I was going to chance 30+ glass balls (his favorite toy) with this monster around.
side note: every year bubbs and I argue over if the word is "bulbs" or "balls".
At my sister's party last week, I wanted to try this pinterest find:

I didn't get around to it in time, but got to thinking they would be really cool ornaments for the tree.
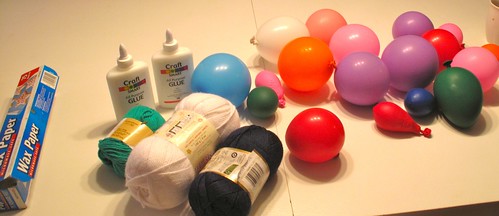
After visiting Michael's in a HELLISH Black Friday rush (I never go out on Black Friday, but really wanted a tree early this year), I came home with Elmer's glue, three colors of yarn, and a Christmas Tree (okay, the tree was from a lot).
So, the project.
Supplies Needed:
Yarn
*I think the less fluffy/thinner yarn looks WAY better than the thicker more "yarny" yarn
20 balloons
elmer's glue
shallow pan
string/rope/ribbon
something to hang them on
newspaper
wax paper
clothes pins
Steps:
1) Blow up balloons.
I should have gotten smaller balloons. The ones we got worked, but they were a little smushy and I think that created some problems. Anyway...
2) Cut up a TON of 3ft (1 yd) pieces of yarn.
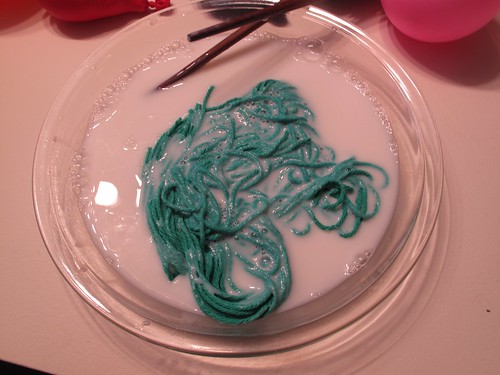
3) Mix 1:1 ratio of water and glue.
4) Stir up your strings and get 'em nice and goopy.
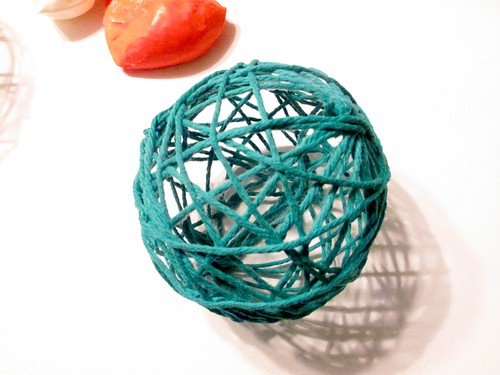
5) Start layering them on the balloons.
Tighter is better and more is better. I wish I had done a TON more yarn. I was rushing and next year when I do it again, I'll do twice as much.
6) Hang your balloons with clothespins
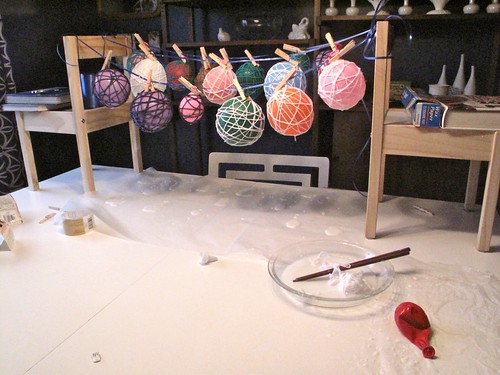
Lesson Learned: glue goes through wax paper. Layer something else under the wax paper so you don't end up scrubbing glue off your dining room table.
7) Allow to dry overnight
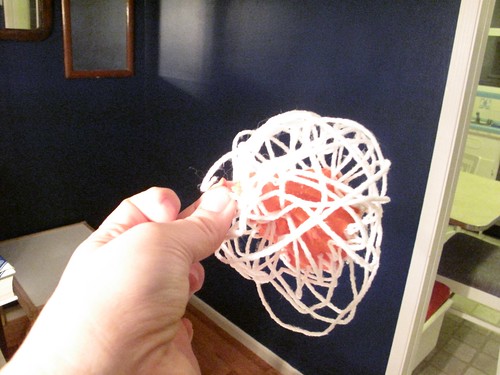
8) With a sewing needle, pop the balloons.
9) Get super freaked out because it looks like your ornaments are dying.
10) Feel better because they pop mostly back into shape.
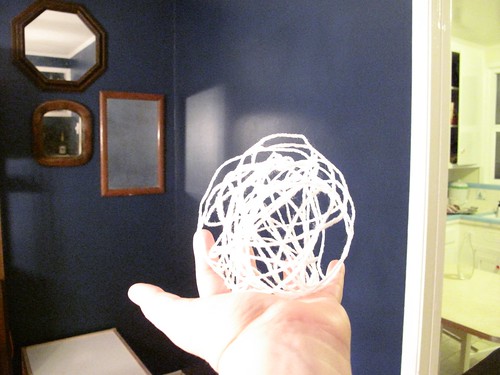
11) Once the balloon is all the way deflated, pull it out through one of the holes.
This is my favorite one :)
12) Attach ornament hooks and hang from tree
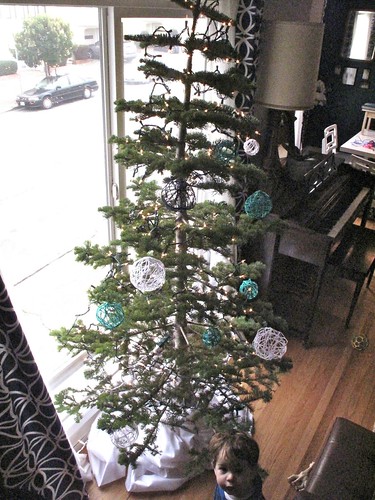

Last step: Learn to take better pictures of the tree
argh! pictures stopped loading at step #10! I was left with an image of drooping yarn blobs! Love the concept, though, and I'm sure the result is gorgeous!
ReplyDeleteYou are such a goddess. I can't believe you bring home the bacon and still find time to MAKE your ornaments. I would hate you if I didn't love you so much.
Oh no! You'll have to come see them in person :)
ReplyDeleteThis project was So easy.
I forgot to mention the part where Bubbs and T kept each other busy by taking ALL of the clothes pins out of the package and deconstructing them under the dining room table.
And the part where it took me three days to do it when it should have taken 30 minutes :)
this is so pretty i love it! can't wait to have my own tree one day to try this. you know i cant do this with Tina's tree ^^
ReplyDelete